
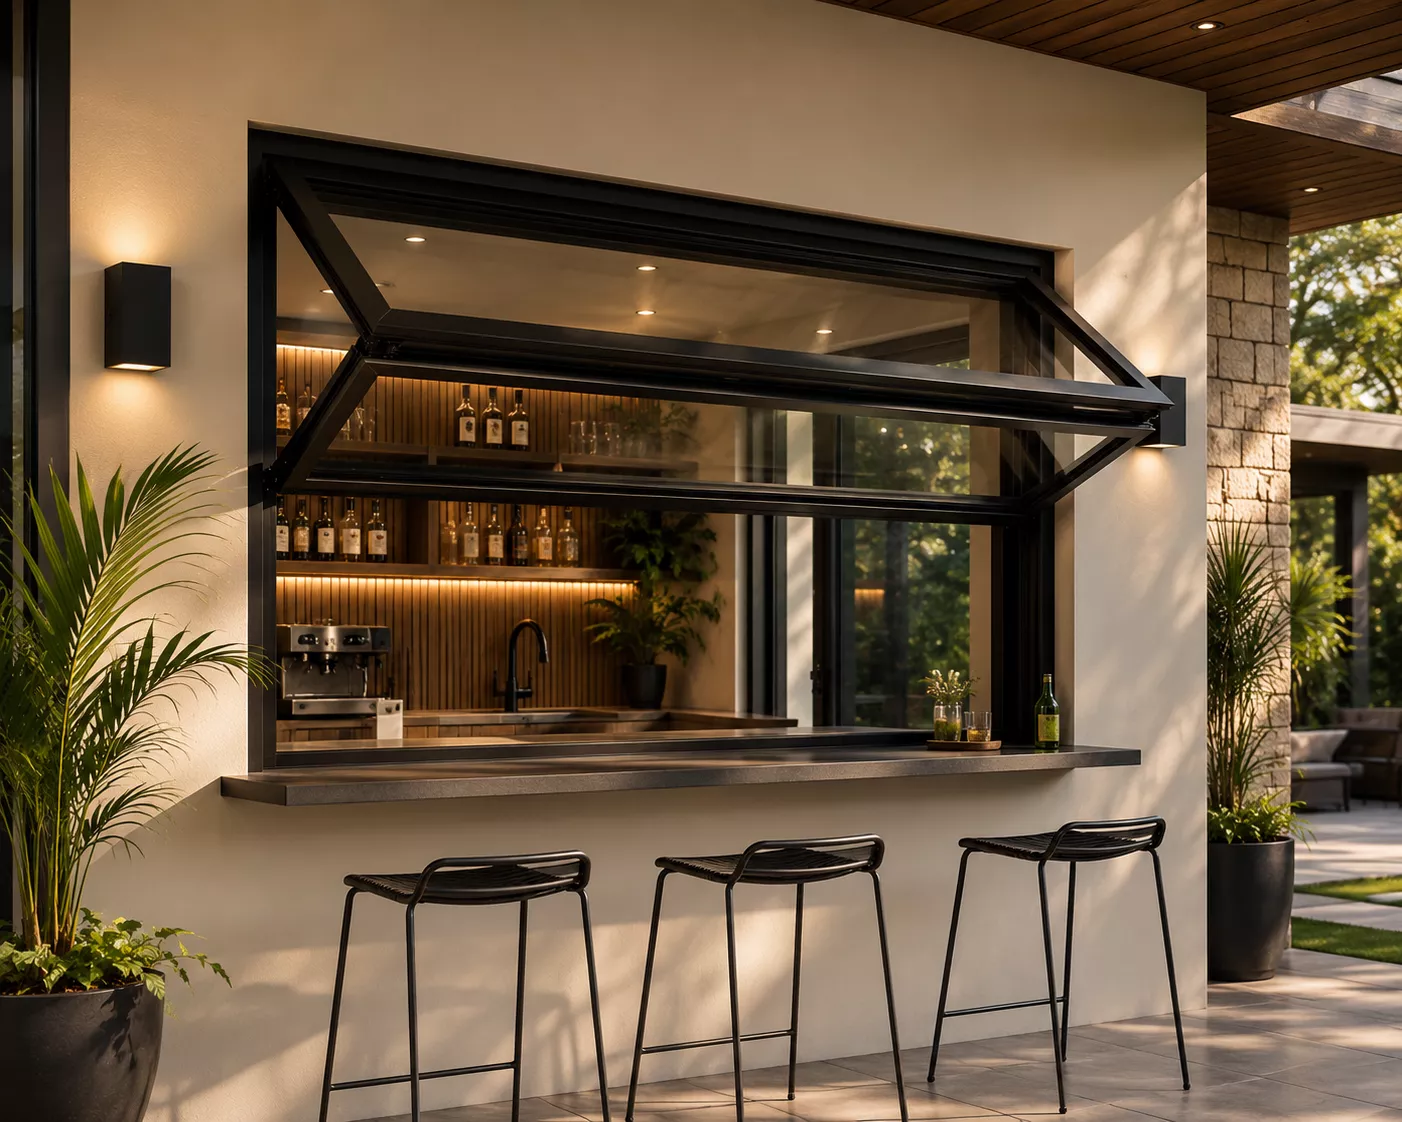
Folding-up windows use a top-hinged sash supported by gas struts or friction arms, so correct installation of both the frame and the support mechanism is essential for safe, smooth, and long-lasting operation. Unlike a sliding or fixed window, the installation sequence for a folding up window has to account for the sash’s changing centre of gravity as it moves from closed to fully open, which means each stage of the process needs to be checked and rechecked before moving to the next.
This guide provides a general overview of the installation process. While experienced builders may be familiar with standard window installations, professional installation is strongly recommended for folding-up windows, particularly larger or custom units, given the added complexity of strut attachment and load balancing.
Before You Begin
Inspect the window thoroughly to ensure all components have arrived in good condition before starting. Check the following:
- Window frame
- Window sash
- Gas struts or friction arms
- Top hinges
- Handles
- Locking hardware
- Glass
- Installation accessories
- Fasteners and fixings
- Any packers, brackets, or strut mounting plates supplied separately
If any component is damaged or missing, contact your supplier before beginning installation. It’s particularly important to confirm that the correct number and rating of struts have been supplied for the size and weight of the sash, as an undersized strut set can fail prematurely or struggle to hold the sash open safely.
Tools You’ll Need
Tape measure, spirit level (including a longer level for checking the head), drill and drill bits, impact driver, screwdrivers, silicone sealant, sealant gun, rubber mallet, packers and shims, utility knife, safety gloves, safety glasses, and a ladder if required. Always use fixings suitable for the wall material, whether timber, masonry, steel, or concrete.
Prepare the Opening
The structural opening should be fully prepared before positioning the window. Confirm that:
- Measurements match the manufactured window
- The opening is square
- The head is level along its full length
- The sill is level
- Structural supports are complete, particularly above the opening where the hinge line will be fixed
- The opening is clean and free from dust or debris
- Existing sealants have been removed in replacement projects
Proper preparation helps ensure an accurate fit and simplifies every subsequent stage of the installation.
Position the Window Frame
Carefully lift the frame into the structural opening. Before securing the frame:
- Centre the frame evenly within the opening
- Maintain equal clearance around all sides
- Support the frame with packers where required, particularly beneath the sill and at the head
- Check that the frame remains level and plumb, with particular attention to the head, since this establishes the hinge line
A spirit level should be used throughout this stage to confirm accurate alignment. Avoid forcing the frame into position, as this can twist the frame and directly affect how evenly the sash swings once installed.
Secure the Frame
Once the frame has been aligned correctly, secure it using the recommended fixing points. As you install each fixing:
- Recheck the level, especially along the head
- Confirm diagonal measurements remain equal
- Ensure the frame has not twisted
- Maintain consistent spacing around the frame
Do not overtighten the fasteners, as excessive pressure may distort the frame and affect both the swing of the sash and the seating of the hinge.
Install the Window Sash
After the frame has been secured, install the window sash following the manufacturer’s recommended procedure. Carefully position the sash onto the top hinge while ensuring:
- Hinges align correctly along the full width of the sash
- The sash swings freely with no early resistance
- Clearances remain consistent around all edges
- There is no binding or rubbing against the frame
Because folding up windows often contain large, glazed panels supported entirely from a top hinge, lifting and positioning the sash should always be performed by two people, with one supporting the weight while the other engages the hinge.
Attach the Gas Struts or Friction Arms
Gas struts or arms are the defining feature of this window system and should only be installed after the sash has been positioned and hinged correctly. Attach each strut or arm securely to its designated mounting points, working symmetrically if more than one strut is used, so the load is shared evenly from the outset.
Once installed, test the operation by carefully opening the window through its full range. The sash should:
- Lift smoothly with consistent resistance throughout
- Remain securely in the open position without drifting
- Close evenly, with both sides reaching the frame at the same time
- Operate without excessive force at any point in the arc
If resistance feels uneven, or if one side of the sash reaches the closed or open position before the other, inspect the strut mounting points and hinge alignment before proceeding further.
Check Alignment
Operate the window several times before completing the installation. Confirm that:
- The sash swings smoothly through its full arc
- The window closes evenly on both sides
- Locking hardware aligns correctly when closed
- Gaps around the frame are consistent
- Weather seals compress evenly along all edges
Minor adjustments to the struts or hinges may be required before the installation is considered complete.
Install Handles and Locking Hardware
Install all supplied hardware according to the manufacturer’s instructions. Verify that:
- Handles operate smoothly
- Locks engage correctly
- Keys turn freely, where applicable
- Latches secure the sash firmly in the closed position
Properly adjusted hardware contributes to both the security of the opening and its overall weather resistance.
Apply Weather Seals and Sealant
Inspect all perimeter seals before applying exterior sealant. Use a high-quality, exterior-grade silicone sealant around the outside of the frame where required. Ensure that:
- All joints are sealed
- Drainage paths at the base of the frame remain unobstructed
- Excess sealant is removed neatly
- No sealant is applied around the hinge or strut mechanisms, which need to remain free to move
Avoid blocking drainage holes, as they allow moisture to escape from the frame and sill area.
Perform Final Checks
Before placing the window into regular use, complete a thorough inspection. Confirm that:
✔ Frame is level, particularly along the head
✔ Sash swings smoothly through its full range
✔ Gas struts or arms support the sash correctly and evenly
✔ Locks engage securely
✔ Handles operate easily
✔ Weather seals fit properly along all edges
✔ Drainage holes remain clear
✔ Glass is clean and undamaged
✔ Overhead clearance for the raised sash has been rechecked on site
A final inspection ensures the window is operating safely and efficiently before handover.
Installation Tips for Best Results
- Install only into a level, square structural opening
- Use appropriate packers during alignment, particularly at the head
- Check the level frequently throughout installation, not just at the start
- Protect the frame and glass from scratches during handling
- Remove protective films only after installation is complete
- Test the sash multiple times, at multiple open angles, before sealing the frame
- Follow the manufacturer’s recommended torque for fixings and strut mounting bolts
Common Installation Mistakes to Avoid
- Incorrect measurements carried through from the ordering stage
- Installing into an unlevel head or uneven opening
- Failing to check the head is level along its full length
- Overtightening fixings, which can distort the frame
- Attaching struts before the sash hinge alignment has been confirmed
- Blocking drainage holes with excess sealant
- Misaligning hinges across a multi-panel configuration
- Applying sealant to the hinge or strut mechanisms
Should You Install a Folding Up Window Yourself?
Smaller folding up windows may be suitable for experienced DIY installers. However, professional installation is strongly recommended for larger windows, custom-built units, multi-strut configurations, and commercial applications, given the added complexity of managing sash weight safely during installation.
Professional installers can ensure:
- Accurate frame and hinge alignment
- Safe handling of large, glazed panels
- Correct strut selection and even load distribution
- Compliance with local building regulations
- Manufacturer warranty requirements are met
Frequently Asked Questions
How long does it take to install a folding up window?
Most residential installations can be completed within a few hours, while larger custom or multi-strut commercial installations may require additional time depending on site conditions.
Can folding up windows be installed in existing walls?
Yes, in both new construction and renovation projects, provided the structural opening — particularly the head — has been prepared and levelled correctly.
Do folding up windows require additional structural support at the head?
Often, yes. Because the entire weight of the sash is carried by the top hinge, the head may need additional reinforcement compared to a standard window opening.
Can I install a folding up window above an outdoor kitchen?
Yes — this is one of the most common applications, and careful attention should be paid to overhead clearance above rangehoods, pendant lighting, and cabinetry.
Should I hire a professional installer?
Professional installers should fit folding-up windows because the hinges and struts support significant loads. Their expertise is especially important for larger or custom units.